
Drawing Trees Tutorial 1 — part 3
by Vincent D Whitehead ©2008Bark: Stumps and Trunks
Taking a Medium point pen, ensure you have good ink flow, and then clean the ball tip as before. With a light touch, begin to add darker tone layers by following the previous contour lines that were laid down with the Fine point pen. I start in the darkest area and work my way through to the area that will be the lightest.
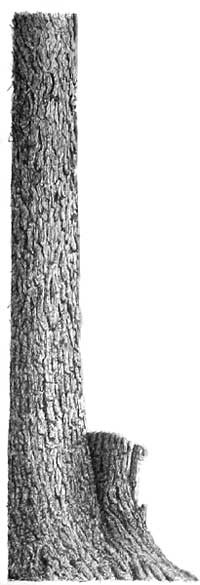
Completed stump
Moving on...
From here I moved to the full tree just to the left of the stump. It is a matter of repeating the process that we did on the stump with a few minor adjustments. Since the tree is not cut off and there are no limbs or leaves in front of it, I will start at the base and work my way up.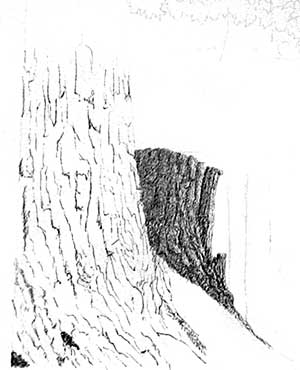
Using the Fine-point pen again, I get the bark layout lines in.
Then put in the angled depth lines along the bark section edges.
Now I want to focus on the section between the stump and the base of the tree. This is a portion of root section that is a bit different from the rest of the tree. It is a transition point between the two subjects. I don't want it to be so different that it stands out, but I also don't want it to merely be swallowed up by the rest of the image. I will define the bark lines lightly and then use the drag technique in an arched line stroke to show a slight roundness to the surface. Starting from the top of this section where the stump and the tree seem to come together and working my way down broadening the stroke as I come to the bottom.
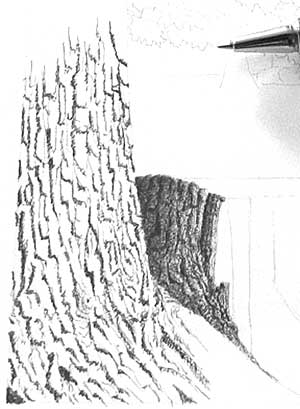
Once this area is defined and toned I moved to the tree trunk on the left. I used the layering directional lines as described in the stump portion to build the texture in the bark sections. Then using the drag technique I built the values in the section of the tree to where I wanted them. Then use the stipple technique to push the textures up.
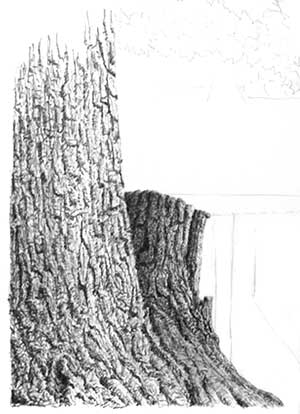
Then a final drag layer is used to blend the tones.
The next step is to take the Medium-point pen and bring in the darker tones to build up the shadows and show those wonderful highlights.
Then a final drag layer is used to blend the tones.
The next step is to take the Medium-point pen and bring in the darker tones to build up the shadows and show those wonderful highlights.
! Remember — we are only drawing the shadowed areas. The highlights we must leave for them to show. That is the reason I tell you to work in light layers. Once you get a very dark tone down in ink, it's very difficult to lift the tone and bring back highlights.
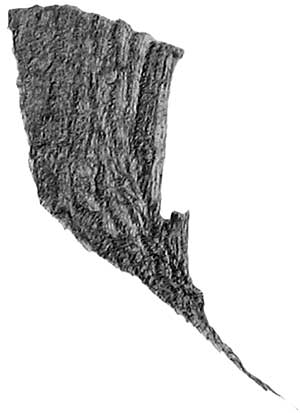
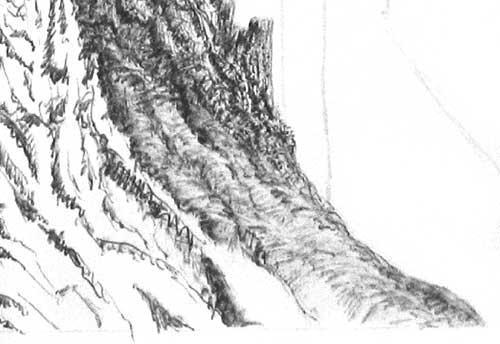
In this next photo you see the results after adding 3 more layers of Medium-point work combining line strokes and the drag method. There are six layers in the darkest point of this image in the bark work. I constantly refer back to the reference photo to determine how dark I want to go in the shadowed areas. Those darks make the image go from flat to 3-D and make the image more believable or realistic.
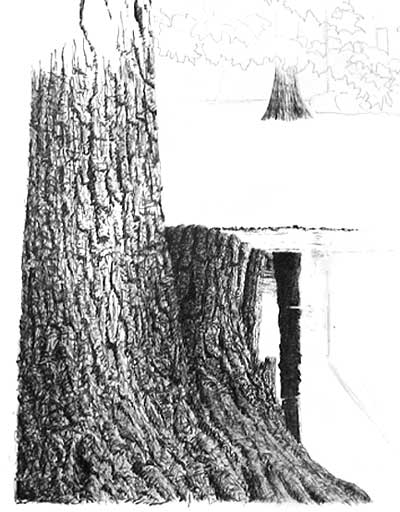
For the rest of the tree trunk in this image, since is not covered by any overlapping limbs or branches, it can be finished by using the techniques that we have already gone over.
Refer back to the reference photo and put in the bark layout lines so that the rest of the tree trunk matches closely and follows the same growth patterns throughout. There will be some slightly darker shadows on the left side trunk edge. This shows that the trunk is rounded away from the viewer, and it gets naturally a bit darker as it goes up away from the viewer. Likewise, the details get smaller and less defined as it gets farther from view.
The cropped image shows the tree trunk completed with all the tone layers in place.
In tutorial 2 I will show you how the Leaf work is done, and how it is incorporated into the rest of the drawing in the Gilbert Home Portrait. Part three will be on mid-ground and distant trees. Part four will be on the Oak tree without leaves from the Elwer barn drawing called “Between Two Trees”. Then, part five will be on the North American Blue Spruce, from the same Elwer Barn drawing.
To see larger images of both the completed drawings that I am using as references for these tutorials please go the Gallery sections. Thank you and I hope that this information is helpful to you.
You can any questions and I will be happy to answer you.
To see larger images of both the completed drawings that I am using as references for these tutorials please go the Gallery sections. Thank you and I hope that this information is helpful to you.
You can any questions and I will be happy to answer you.