
Drawing Trees Tutorial 2 — part 2
by Vincent D Whitehead ©2008Leaf Work - Tree Foliage
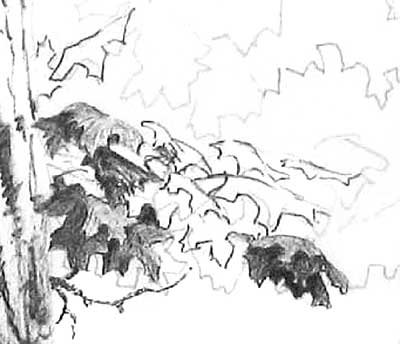
Once the leaf clump is outlined, the detail and tone work is completed and I have built the layers to create depth in the shadows I put in the actual branch itself. I start at the point closest to the tree trunk and work my way out to the end of the leaf clump. I use the Fine point pen to do this and work in a light line stroke from left to right. Once I get the basic flow of the branch in I will add small twig work and finally a few leaf stems. After that I go back and add layers in areas of the branch to show cast shadows from overlapping leaves. I then put in the final tone layers to show shadow from the opposite side of the branch from the light source.
As you can see in this image, there really are only one or two leaves that are close to being drawn completely. Most of the leaves are really only portions or ends of leaves. I only used the darkest of tones in areas that overlapping leaves prevent almost all of the light from getting through. The next branch above is done as this first one was.
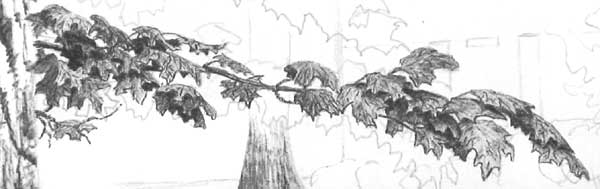
You can see, in this image, that I have drawn what I call a "completed leaf". It's just above the start of the main leaf clump in the second branch near the tree trunk. These leaves will be approximately the same size since they are close together in the image and relatively the same distance from the viewer.
! Remember, as objects in the scene get farther away from the viewer they need to get smaller. Details also get less obvious. This helps to create depth in the image. Consistency in this reduction in size and detail throughout the drawing will help build a realistic or believable drawing.
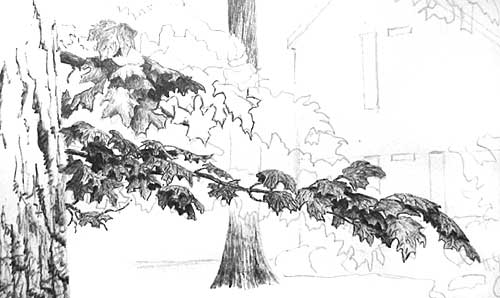
This is the second leaf clump finished. You can see that I left it a bit lighter than the first clump. There is a bit more light showing on sections of this leaf clump than on the lower one and I want to leave myself some highlights to work with a bit further into the drawing. So, for now it will be left as it is. You can also see in the image that I went on and finished putting in the first and second layers of line work in the tree in the mid-ground on the far bank. I will come back to this in a later phase.